The Superior Works: Patrick's Blood and Gore Planes #1 - #8C
Quick Find: #1, #2, #2C, #3, #3C, #4, #A4, #S4, #4C, #4 1/2, #4 1/2C, #4 1/2H, #5, #A5, #S5, #5C, #5 1/4, #5 1/4C, #5 1/2, #5 1/2C, #5 1/2H, #6, #A6, #6C, #7, #7C, #8, #8C
 Let the games
begin, starting with the bread and butter of Stanley, upon
which they built an
empire, the Bailey patent bench plane in its various
configurations. Leonard
Bailey designed what has become the standard plane
configuration that's still
in use to this day. He was the undisputed champion of the
plane slugfest that
errupted in the decades after the Civil War. If you're at
all fascinated with
handplane design, follow this link to read all about the Better
Moustraps.
Let the games
begin, starting with the bread and butter of Stanley, upon
which they built an
empire, the Bailey patent bench plane in its various
configurations. Leonard
Bailey designed what has become the standard plane
configuration that's still
in use to this day. He was the undisputed champion of the
plane slugfest that
errupted in the decades after the Civil War. If you're at
all fascinated with
handplane design, follow this link to read all about the Better
Moustraps.
A general description of stuff to look for when
examining a bench plane is
listed under the #3
smoother. This stuff is applicable to all Stanley bench
planes of the basic
Bailey design (as well as those that incorporate the
Bailey patents such as the
Bed Rocks), and comes from my observances of thousands of
these planes.
 All
dimensions
that follow each number indicate the length of the sole, the
width of the
cutter, and the weight of the tool. There were some subtle
differences in the
dimensions, but only those that are significant are
mentioned where
appropriate. Some of the bench planes are a bit
longer/shorter, wider/narrower,
heavier/lighter than what's noted for the fact that the
planes used many
patterns over their decades of production. So, if you have a
plane that's
one-half inch shorter or longer than what's mentioned here,
don't go thinking
that you have some ultra-rare version of the tool. You don't
(except in the
case of the #2). If
the plane is inches shorter than what's listed here, you
have one that's
suffered an amputation along the way.
All
dimensions
that follow each number indicate the length of the sole, the
width of the
cutter, and the weight of the tool. There were some subtle
differences in the
dimensions, but only those that are significant are
mentioned where
appropriate. Some of the bench planes are a bit
longer/shorter, wider/narrower,
heavier/lighter than what's noted for the fact that the
planes used many
patterns over their decades of production. So, if you have a
plane that's
one-half inch shorter or longer than what's mentioned here,
don't go thinking
that you have some ultra-rare version of the tool. You don't
(except in the
case of the #2). If
the plane is inches shorter than what's listed here, you
have one that's
suffered an amputation along the way.
One other thing - you'll note that I sometimes refer
to the cutter as the
iron and vice versa. I've always used the term 'iron' to
represent the chunk of
metal you sharpen to make the plane a plane. Stanley, in
their reams of
propaganda, referred to it as a 'cutter'. I'll occasionally
slip into the Stanley
mantra, and use their lingo, even when I know better that
it's properly called
an 'iron'.
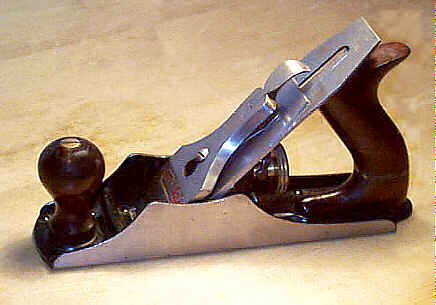
#1 Smooth plane, 5 1/2"L, 1 1/4"W, 1 1/8lbs, 1869-1943. *
 This is the
first plane of the Bailey series, which Stanley made into
the world's standard
plane configuration after they bought the patent rights to
the design from
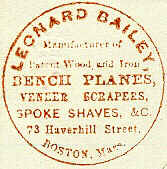
Leonard Bailey, who was making the planes in relative
obscurity in Boston,
Massachusetts during the 1860's. Bailey had experimented
with several designs,
but finally settled upon a style that is still being
manufactured, with minor
modification, today.
This is the
first plane of the Bailey series, which Stanley made into
the world's standard
plane configuration after they bought the patent rights to
the design from
Leonard Bailey, who was making the planes in relative
obscurity in Boston,
Massachusetts during the 1860's. Bailey had experimented
with several designs,
but finally settled upon a style that is still being
manufactured, with minor
modification, today.
This plane was designed to smooth small areas and was
found practical by
many since it can be used with one hand, much like a block
plane is. It never
has a number cast on it, nor was it ever provided a lateral
adjustment lever.
The plane always has a solid brass nut for the iron's depth
adjustment; i.e.,
the brass nut does not have the hollow depression that is
typically found on
the nuts used on the larger bench planes.
They are cute little planes that look sorta neat on a
mantle, or on top of
your TV, which is probably a better place for them than in
your shop due to
their value. Every serious collector of old tools wants one
of these little
monkeys, which makes the cost of owning one rather steep. I
wish I bought every
last one I saw a dozen years ago - I'd be wintering in Palm
Beach, if I had.
This plane never was corrugated (see #2C's listing below). Do not ever
buy one that is. The
Ohio Tool Company did make a corrugated version of this
plane, but they ain't
Stanley, which is the company of concern here.
The plane has been reproduced and can fool the novice
very easily. The
quickest way to tell if it is a fake is by examining the
threaded rod on which
the depth adjustment nut (the brass knob) traverses. An
original has its rod
perfectly parallel to the sole of the plane, whereas the
reproduction has its
tilted upward toward the tote. The irons of some
reproductions have the logo
stamped on both sides, but this can't be relied upon as a
foolproof
identification of the plane's originality since there are a
lot of unused
legitimate #1 irons
out there and it's
very easy to switch the reproduction iron with an original
one. The castings of
the reproductions are coarser than on the originals, but
unless you've seen an
original, you really don't have any idea what the correct
texture is. A modern
manufacturer makes a very nice copy of the plane, but it
could never fool
anyone as being original since his is made of the usual
bronze alloy and the
knob and tote are not rosewood.
These planes are generally in very good, or better,
condition since they
were used very little. There are far too many of them out
there to be
considered salesman's samples or novelties as some people
believe them to be.
As proof that they were used, they do suffer damage,
primarily about their
mouth. The thinness, and consequent fragility, of the bottom
casting makes this
damage the most commonly found on these planes. A cracked
tote is another
fairly common flaw found on these planes. There are guys
making reproduction
totes for these and other planes. Be careful when you buy!
Another form of damage I've noticed on them is one I
can never understand
how it ever happened in the first place. The screws used to
secure the frog to
the bottom casting actually poke through the sole! The cause
of this is because
the washers were not used along with the screws, which means
that the sole had
to be drilled in order for the screws to seat. This damage
is very easy to
recognize - flip the plane over and look for two screws
staring back at you.
It's that simple. You'll cringe in horror the first time you
ever see it.
The screws used to secure the frog to the base have
round heads, and not
flat ones (the earliest larger bench planes had round heads,
but later were
changed to flat ones). Also, the frog, and its mating to the
bottom, only
underwent one redesign during its production, which is far
less than the
redesigns the larger bench planes had done to them. The
earliest models have an
I-shaped, or H-shaped (depending upon how it's viewed)
receiving area for the
frog. Subsequent models have the broad and flat receiving
area.
Strangely, more than a few of these planes are
missing their knobs. Maybe
it's because junior stole them to play marbles, or something
like that. The
knobs of the #98 and #99 are a close match and a
source for replacements.
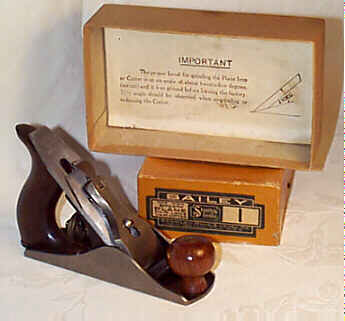
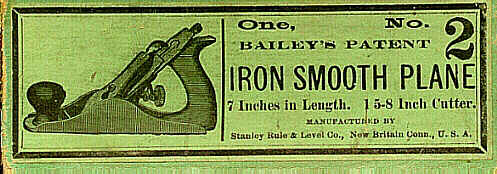
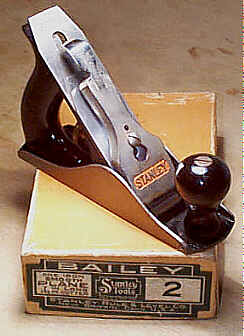
#2 Smooth plane, 7"L, 1 5/8"W, 2 1/4lbs, 1869-1961. *
 Another plane
to smooth small areas. A smooth plane, according to some
Stanley propaganda
"is used for finishing or smoothing off flat surfaces.
Where uneven
spots are of slight area, its short length will permit it
to locate these
irregularities, leaving the work with a smooth surface
when finished." Good
ol' Stanley, providing us woodworkers
with a smoother for all occasions. While the #2
is certainly
scarce (when compared to the larger bench planes), proving
that its use was
rather limited, it nevertheless is a useful tool for when
one is faced with
some isolated stubborn grain or smoothing smaller pieces of
work. Its small
size permits it to work smaller areas more effectively than
the larger and more
common #4.
Another plane
to smooth small areas. A smooth plane, according to some
Stanley propaganda
"is used for finishing or smoothing off flat surfaces.
Where uneven
spots are of slight area, its short length will permit it
to locate these
irregularities, leaving the work with a smooth surface
when finished." Good
ol' Stanley, providing us woodworkers
with a smoother for all occasions. While the #2
is certainly
scarce (when compared to the larger bench planes), proving
that its use was
rather limited, it nevertheless is a useful tool for when
one is faced with
some isolated stubborn grain or smoothing smaller pieces of
work. Its small
size permits it to work smaller areas more effectively than
the larger and more
common #4.
It's very difficult to close your hand around the
tote on this one, unless
you have small hands. Be very careful that the lever cap is
proper for this
plane - it's very easy to grind a #3 lever cap narrower to fit this
plane. Look at the
sides of the lever cap, when it's clamped in place - a
ground #3 lever cap will have
its sides projecting well above the highest point on each
of the bottom
casting's arched sides. Give the machining along the edges
of the lever cap a
close inspection to verify that it's a proper #2 lever cap.
 A common area of
damage
on the #2's is at
the very rear of the
sole, or heel of the plane, where the threaded rod (used
to secure the tote to
the bottom casting) is received by a raised boss in the
bottom casting. On some
models of the plane, this area is not flush with the sole
proper (there are
some models that have this area flush with the sole), and
sometimes can break.
Inspect it carefully for repairs. Sometimes, the threaded
rod will be tapped
through the sole. This damage is clearly visible by
flipping the plane over and
looking at the sole. Similar damage can be found on the
larger bench planes.
A common area of
damage
on the #2's is at
the very rear of the
sole, or heel of the plane, where the threaded rod (used
to secure the tote to
the bottom casting) is received by a raised boss in the
bottom casting. On some
models of the plane, this area is not flush with the sole
proper (there are
some models that have this area flush with the sole), and
sometimes can break.
Inspect it carefully for repairs. Sometimes, the threaded
rod will be tapped
through the sole. This damage is clearly visible by
flipping the plane over and
looking at the sole. Similar damage can be found on the
larger bench planes.
This plane never came equipped with the frog
adjusting screw that was
offered on the larger bench planes, nor did it experience
the changes in the
frog's receiver, save for the first (H-shaped) to the second
(broad machined
area) designs (see the #3 for an explanation and images of the changes in
the frog's receiver).
And for those of you who follow the type studies
religiously (keep in mind that
Stanley never knew about the type studies when they were
making their stuff),
this plane doesn't follow the study very well. It seems as
if the Stanley
employees, given the task of making #2's, were off in their happy, little #2-land, oblivious to the changes
made to the plane's
larger brothers. No model of the #2
has the patent date(s) cast into it, behind the frog.
The brass depth adjustment nut used on this plane is
different from all the
others. On most of the examples (excluding the very earliest
ones, with their
solid nuts), the nut is very slightly hollow (concave) and
is noticeably shallower
than those nuts used on the larger bench planes. Check that
the nut hasn't been
replaced with one off a larger plane.
A scarce late-production model of this plane measures
roughly 1/2"
longer than the earlier models. It almost passes as a #3, but its cutter is the
usual 1 5/8"W. Examples
of this plane usually have "BAILEY" cast at their toe, but
they don't
always, so have a tape measure handy to see if it measures
8" long. They
also have the larger brass depth adjustment nut like those
used on the larger
bench planes. The cutter is not rounded at the top, but is
angled as it was
from the day it was first made. Most of these planes are
japanned with the
typical black paint, but the very last ones to leave New
Britain are instead
japanned blue.
#2C Smooth plane, 7"L, 1 5/8"W, 2 1/4lbs, 1898-1943. *
The "C" designation means that the sole has a series of parallel grooves machined into it. There is no "C" cast into this plane, nor any other of the corrugated bench planes.
The corrugations are provided to overcome the
'friction' that results
between the wood and the sole as the wood becomes true; a
small vacuum forms
between the two surfaces. Whether this 'friction' becomes a
bother to the
craftsman depends upon the species of wood being planed and
the overall
strength or endurance of the dude pushing the plane. I've
never really been
bothered by the 'friction', but it appears that many others
have, judging by
the number of corrugated planes out there and the length of
time that they were
offered. Some also claim that the corrugations are useful on
resinous woods -
maybe you will, too.
Prior to the introduction of corrugations, guys would
use wax or oil on the
plane's sole. This was normally used on the longer planes,
where the amount of
'friction' is certainly greater than that formed on the
shorter planes. But for
a plane this small, corrugations are rather overkill. It was
never a popular
feature of this particular plane, thus its scarcity. In
fact, I have seen fewer
#2C's than I have #1's.
Perhaps I need to
ask more #2's
if they mind if I check their bottoms?
I've seen some very crude appearing corrugations on
many of the bench
planes. Some of the planes date prior to Stanley's
production of them. Whether
the planes were corrugated in an attempt to deceive
collectors, or whether the
planes were corrugated by the owner for his own use is
impossible to tell. I
suspect the reason is true in both cases.
 Original
corrugations run lengthwise to the sole and are perfectly
parallel to each
other, stop before the toe, the heel, and before and behind
the mouth. The
corrugations are about as deep as they are wide, have a
crisp definition to
them, and terminate in a pointed fashion. The corrugations
often become filled
with workshop schmutz. You can remove it by taking the
pointed end of a common
nail and scraping it out.
Original
corrugations run lengthwise to the sole and are perfectly
parallel to each
other, stop before the toe, the heel, and before and behind
the mouth. The
corrugations are about as deep as they are wide, have a
crisp definition to
them, and terminate in a pointed fashion. The corrugations
often become filled
with workshop schmutz. You can remove it by taking the
pointed end of a common
nail and scraping it out.
And now for something completely different....
I once was invited over to a woodworker's shop to
look at some tools that he
wanted to sell. The fellow didn't have much, just a few
newer tools from that
tool company in England that is still making pitiful copies
of Stanley's bench
planes. However, the fellow did have several original
Stanleys with soles the
likes of which I've never seen before or since. Each sole
had a series of
1" wide (roughly) cutouts, dados, if you will, that spanned
the width of
the sole spread along the length of the sole. In other
words, the cutouts were
parallel to the mouth! Amazed by what laid before my eyes, I
asked the fellow
what caused or what was the reason for this strange
treatment. He told me that
he had taken the planes to a local machinist and asked him
to cut some
corrugations into the soles since he had heard that
corrugations help to make
the plane perform better. For the first time in my life, I
was left speechless,
and could only muster an "Oh, I see" as an answer. The
planes have
since left his shop, so you folks out in western
Massachusetts be careful out
there while tool sleuthing. If you ever see one, and
unknowingly buy it, I
suppose you could always flip it over and use it as a boot
scraper, or
something like that.
#3 Smooth plane, 8"L, 1 3/4"W, 3 1/8lbs, 1869-1984.
A very common smoothing plane, which some prefer over the larger #4.
As in all the metal bench planes, check that the
bottom casting (or bed)
isn't cracked anywhere - more often than not, the cracks
appear on the arched
sides or around the mouth. The mouth proper is also prone to
chipping. Now and
then you might stumble across a bench plane that has some
cosmetic surgery,
where the entire forward (of the mouth) portion of the main
casting was broken
off and subsequently welded back onto the rest of the plane.
Run, don't walk,
away from these examples, unless you're snarfing parts.
Stay away from those planes that exhibit tool
leprosy, pitting. A few minor
pits on the sides isn't going to hurt the plane's use, but
badly pitted
examples are generally a lost cause.
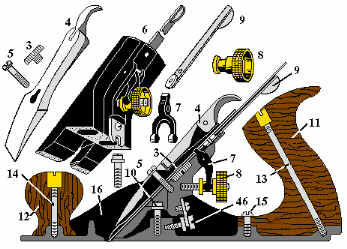 #3 - Cap Screw
#4 - Lever Cap
#5 - Lever Cap Screw
#6 - Frog Complete
#7 - "Y" Adjusting Lever
#8 - Adjusting Nut
#9 - Lateral Adjusting Lever
#10 - Frog Screw
#11 - Plane Handle (Tote)
#12 - Plane Knob
#13 - Handle (Tote) Bolt and Nut
#14 - Knob Bolt and Nut
#15 - Plane Handle (Tote) Screw
#16 - Plane Bottom
#46 - Frog Adjusting Screw
Make sure the frog isn't broken - curiously, many of them have their frogs snapped off at their tops where the lateral adjustment lever is supposed to be (the earliest models, pre-1885, never had a lateral adjustment lever). I've also seen a frog that had the 'web' of cast iron between the two frog screws snapped off. How this happened is almost beyond comprehension, but a good guess is some klutz slipped with his screwdriver when loosening/tightening the screw. This is rare damage, but it just goes to show you that these planes can be damaged anywhere and it's just good practice to examine them thoroughly before you buy.
 Some planes
are
missing their lateral adjustment lever. It's attached to the
top of the frog
with a small, peened over pin. Through hard use, the pin can
wear out,
detaching the lever from the frog. If there is a 3/16"
(roughly) hole
centered at the top of the frog, the plane had a lateral
adjustment lever. If
the hole is not present, the plane is an earlier model that
dates prior to the
introduction of the lateral lever which made its debut in
1885 (the first
lateral has a bent up edge that engages the cap iron, while
the later style,
first introduced in 1888, has a circular disk to engage the
cap iron). Don't
retrofit your plane with a lever, if it never had one. Sell
it to a collector,
then take the proceeds and buy a model that is equipped with
the lever.
Some planes
are
missing their lateral adjustment lever. It's attached to the
top of the frog
with a small, peened over pin. Through hard use, the pin can
wear out,
detaching the lever from the frog. If there is a 3/16"
(roughly) hole
centered at the top of the frog, the plane had a lateral
adjustment lever. If
the hole is not present, the plane is an earlier model that
dates prior to the
introduction of the lateral lever which made its debut in
1885 (the first
lateral has a bent up edge that engages the cap iron, while
the later style,
first introduced in 1888, has a circular disk to engage the
cap iron). Don't
retrofit your plane with a lever, if it never had one. Sell
it to a collector,
then take the proceeds and buy a model that is equipped with
the lever.
Most of the models have rosewood for the knob and
tote (WWII years, and from
the mid-50's on, had stained hardwood). In what has to be an
error, the 1927 catalogue
states that cocobolo was used for the totes and knobs on all
the bench planes,
except for the #1, #1C, #2, and #2C. I have never seen a Stanley
bench plane with cocobolo
used, and the mention of a fictitious #1C offers some proof that something may have been
rotten in New Britain.
A cracked tote isn't anything to get bothered over,
provided it's tight and
glueable. The 'horn' of the tote is often sheared off on
many of the bench
planes. When the tote is gripped, its horn should extend
about an inch beyond
web of skin between your thumb and forefinger. Many of the
horns are repaired
with nails, screws, glue, or scarfs. Look them over
carefully. Totes are also
prone to cracking near their bases, just above where they
extend forward to
meet the main casting.
The totes on the smaller bench planes - #1
through #4 and the #5 1/4 - are fastened only with the
threaded rod and
countersunk brass nut that passes through the tote. The
larger bench planes - #4 1/2 through #8
- use the same means
of fastening the tote to the main casting, with an
additional round-headed
screw at the toe of the tote. The totes on these larger
planes sit over a
raised tote receiver into which the screw and threaded rod
are screwed. This is
as good a place as any to mention that Stanley loved to
use non-standard
threads, and it's nowhere more apparant than the hardware
used to attach the
wood to the main casting.
There are reproduction totes out there, and some of
them are quite good. A
reproduction tote isn't so much a concern on a common plane
that's to be used,
but it is a concern on the collectible examples of the
series, like the #1, #2, and #2C. During the 1920's,
Stanley applied a brightly colored decal on the left side
of the totes on many
of their planes. Generally, the presence of this decal
increases the value of
the tool as it's indicative of the tool's condition since
the decals wore off
rather quickly and easily from use. Some of the
reproduction totes are available
with decals, which themselves are reproductions. You
should be very careful
when buying a collectible plane that has a decal on the
tote unless you're sure
you can recognize the reproduction. The background of the
original decal is an
aquamarine color whereas the reproduction's background
color is a darker blue
green. Plus, the reproduction decal has a 'thicker',
almost silk screened,
appearance to it.
Sometimes, you'll find a plane with a hard rubber
tote with "B of
E" embossed on each side. These were sold by Stanley to
school systems as
replacement totes for the poor planes that suffered the
onslaught of
destruction as wrought by the punks of yesteryear. "B of E"
stands
for Board of Education. These replacement totes were offered
during the 1910's-1920's,
when they were replaced with aluminum totes during the early
1930's. The
replacement totes are most often found on the jack planes
since they were the
commonly used planes in the school systems across the
USofA.
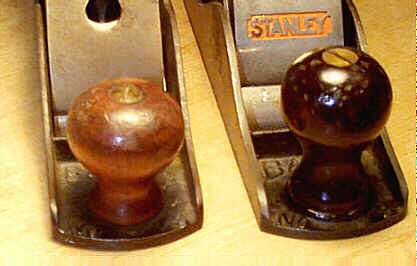 The knob
can
suffer chipping or cracking about its base. This is most
commonly found on the
earlier planes, with their squatty, mushroom-shaped knobs.
The damage is caused
during the plane's use, when the plane is pushed at the
knob; the knob leans
forward, putting stress at its leading portion, making it
split.
The knob
can
suffer chipping or cracking about its base. This is most
commonly found on the
earlier planes, with their squatty, mushroom-shaped knobs.
The damage is caused
during the plane's use, when the plane is pushed at the
knob; the knob leans
forward, putting stress at its leading portion, making it
split.
Many folks found the low knobs difficult to grip,
especially on the shorter
planes. A taller knob, called the "high knob" in the tool
collecting
circus, was offered starting ca. 1920. This knob, being
taller than the low
knob and thus having the force on it applied higher up from
its base, suffered
the same chipping at its base, but only more so than the low
knob. Good idea,
Stanley, but you didn't quite get it right.
Some 10 years later, the solution to knob chipping
was discovered - a raised
ring was cast into the bottom casting to receive the knob.
This solution really
did work, and knob chipping became but a distant memory. If
you're into
originality, there is a minor, but important, detail about
the high knobs - the
later high knob is turned so that its base tapers slightly
to fit into the
raised ring, while the first high knob is turned so that its
base doesn't
diminish where it seats onto the main casting.
The degree of the sole's flatness is a personal
preference (frankly, I think
the current notion of perfect flatness on a bench plane is
simply hype), but
definitely stay away from those that are badly twisted along
their length. You
may need to file nicks out of the plane's sole, if they
project - these will
leave scratches on the wood, which defeats the plane's
purpose.
The bottom casting (not the sole proper, but its
leading and trailing edges)
should be slightly convex at its toe and heel. I've seen
some planes,
especially jack planes, that have had their toe and heel
ground off so that
they are squared across the width of the plane. You'll also
stumble across many
bench planes that have a hole drilled through their bottom
castings. This was
done so that the plane could be hung from a hook when not in
use. This 'feature'
does nothing to the plane's use, but it does kill it as a
collectible,
especially on the scarcer planes. Similar holes can be found
along the sides of
the planes so that they could accept one of the many fences
(ones that can be
adjusted to bevel an edge) that were offered over the years.
The Stanley bench planes are equipped with irons that
are very thin when
compared with the thick irons used on the older wooden
planes. Leonard Bailey
was the first to use these thin irons prior to Stanley
purchasing his patents.
Stanley made it a point to mention the iron's thinness in
their marketing
propaganda by claiming that: 1) They are easier to grind; 2)
They require less
grinding "as a thin cutter can be kept in condition by
honing"; 3)
There is "less tendency to 'stub off' the cutting edge when
honing, hence
the original bevel is kept much longer"; and 4) It "seats
firmer on
the frog." Some modern manufactures are supplying irons that
are aimed as
replacements for the Stanley irons. While these irons are
high quality, they
are also often too thick for the plane to accept them
without having to file
the mouth wider, and that's something you should think long
and hard about as
it's a modification that can potentially affect the value of
the tool in the
long term.
Make sure there is enough meat on the iron and if it
is pitted, your best
bet is to toss it. You'll probably find some amount of
corrosion on the face of
the iron where the cap iron makes contact. This corrosion is
often black in
color and can be lapped out quickly. The corrosion occurs
from the plane
sitting idle where moisture is trapped between the two
irons. Inspect the iron,
even on its backside, for any cracks. The Stanley irons do
crack due to their
thinness, but it is not a common occurrence. I've also seen
an iron
de-laminate; look them over around the bevel for this flaw
(Stanley did equip
their bench planes with laminated irons up to about WWII -
click here to see the
company's propaganda for laminated irons). Make sure the
cap iron fits tightly
against the iron; you'll have to re-grind it if it
doesn't.
Strangely, you'll stumble across irons and cap irons
that have mushroomed
ends, like the kind you see invariably on wooden planes.
Stanley planes that
show this 'handiwork' must have belonged to transitional
woodworkers, where the
line between master carpenter and ham-fisted hack was but a
mere hammer away.
Why anyone would smack the heel of the iron on this kind of
plane is lost on
me. If your plane has this feature, a file will make short
order of it.
Rarely, and I do mean rarely, you might find an bench
plane with a strange
iron in it. It looks as if someone screwed a razor blade
onto the cutting edge
of the normal iron. If you see this, sell the iron to a
collector, and find
yourself a replacement. What you have is another one of
Stanley's boneheaded
ideas - "Ready Edge Blades." This was Stanley's attempt to
make the
life of the workman easier. Whenever the plane's cutter
dulled, he could pull
out a new one and screw it onto the holder. This dreadful
idea came in 1
3/4", 2", and 2 3/8" widths, and, fortunately, only lasted a
short time during the late-1920's to the early 1930's.
 A few chips
on
the lever cap (along its edge of contact with the cap iron)
are nothing to fear.
These chips are from a previous owner using the flat end of
the lever cap as a
screwdriver to loosen the cap iron screw prior to the
sharpening of the iron.
This flaw lessens the value of a plane to a collector, but
does nothing to
hinder the plane's use provided the chips are not severe
enough to prevent
sufficient clamping pressure on the iron.
A few chips
on
the lever cap (along its edge of contact with the cap iron)
are nothing to fear.
These chips are from a previous owner using the flat end of
the lever cap as a
screwdriver to loosen the cap iron screw prior to the
sharpening of the iron.
This flaw lessens the value of a plane to a collector, but
does nothing to
hinder the plane's use provided the chips are not severe
enough to prevent
sufficient clamping pressure on the iron.
The lever cap underwent a subtle design change in the
hole through which the
lever cap screw passes. The first hole is symetrical and
shaped like a key hole.
During the early 1930's, the hole was redesigned (and
patented) so that is has
a kidney shape design. This change was done to address the
supposed problem
with the lever cap backing upward, off the lever cap screw,
as the iron was
drawn back while turning the adjusting screw. The planes had
been made some 70
years, and used successfully for that same time, without the
kidney-shaped hole
so it seems that Stanley made the design change as a gimmick
to differentiate
themselves from the rest of the pack.
Look for stress cracks or outright chips about the
lever cap's screw hole.
This flaw can diminish the plane's utility since the lever
cap is apt to loosen
during use. It's best to pass examples with this problem,
unless you can
salvage it for parts. Test the brass depth adjustment nut to
see if it turns
freely - a lot of times these are seized. If the knurling on
the nut appears
stripped or the nut is mis-shaped (not a circle), it's a
good indication that
someone took drastic measures, like the use of vise-grips,
to free it.
Chips in the bottom casting are sometimes found where
the sides meet the toe
or heel of the plane. These, too, have no harmful affect on
the use of the
plane, but they do lessen its value to a collector. Also,
these chips are
rather jagged so you may want to file them smooth lest they
rip your hands to
shreads during use.
Check the depth adjustment fork, which is held
captive in the frog. It
resembles a wishbone, with each side terminating with a
round shape to the
casting. Each side engages the circular groove in the brass
depth adjustment
nut. Sometimes, one of the sides of the fork breaks off,
making the fork bind
when it's adjusted. These forks are cast iron, but starting
around the
early-1960's they became a cheesy two-piece steel
construction. You might think
it strange that the cast iron fork can break, but break they
do, usually as a
result of too little pressure from the lever cap on the
iron, which then
results in the iron being thrust backward during planing,
putting an extreme
amount of force directly on the fork, ultimately snapping
it.
Stanley, in their instructions for using the planes,
specifically addresses
just how tight the lever caps should be - "If the Cam [of
the lever cap]
will not snap in place easily, slightly loosen the Lever Cap
Screw. If the
Plane Iron is not firmly held when the Cam is in place,
slightly tighten the
Lever Cap Screw." Nowhere does Stanley mention that the
adjusting fork
should be positioned forward so that it buttresses the front
of the slot cut in
the cap iron, as many erroneously believe should be the
case.
Some modern day tool authors, sure in their scholarly
advice, recommend
taking a pair of pliers and squeezing the 'tines' of the
adjusting fork toward
each other to take out some of the slop in the mechanism. DO
NOT EVER DO THIS!
You'll snap the thing as sure as that plaid shirt and
toolbelt wearing guy will
use a bisquick joinah. If the fork is broken, you can pilfer
one from a dogmeat
bench plane by knocking out the pin that allows the fork to
pivot. The pin
normally pops out when driven from left to right (as viewed
from the rear of
the frog).
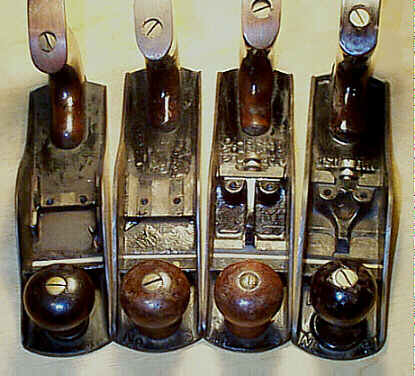 There were
many
modifications made to the bench planes over their
production. These are
outlined in the type study, but the major design change,
that of the frog and
the way it seats on the bottom casting, is mentioned here in
greater detail.
There were
many
modifications made to the bench planes over their
production. These are
outlined in the type study, but the major design change,
that of the frog and
the way it seats on the bottom casting, is mentioned here in
greater detail.
There are four major frog and corresponding receiver
(of the main casting)
designs found on the Bailey bench planes. Sure, there were
some experiments
gone awry and a few minor modifications, but the
descriptions of the four that
follow are those that were in the longest production.
The first design resembles the letter "H" when viewed
from the
front or rear of the plane. The frog is machined to sit on
the sides, or rails,
of this machined area of the main casting. The frog is
screwed to the cross
'beam' that spans the rails. This design was the one Leonard
Bailey finally
settled upon prior to Stanley purchasing his patents.
Stanley continued this
solid design for just a few years until ca. 1872 when they
abandoned it for a
short-lived design that didn't prove resilient enough
(explained later).
The second major design dispensed with the
experimental frog ca. 1874. This
design is simply a broad and flat rectangular area that is
machined on the
bottom casting. This machined area is rather low, and has
two holes that
receive the screws which are used to secure the frog in
place.
Likewise, the bottom of the frog is machined flat to
fit onto the bottom
casting. This method of securing the frog was sound and it
worked well, but the
amount of machining, after the parts were cast, certainly
made production more
costly and slow, and they eventually cast two grooves into
the main casting's
frog receiver (ca. 1888) in order to reduce the area that
had to be machined.
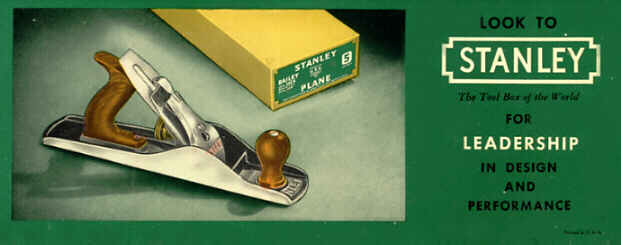
Still, this construction was too costly. Thus, Stanley
needed to modify the
design if they were to become "The Toolbox of the World."
That, and
the exclusive patent rights for the construction were about
to run out, so
Stanley needed something new to patent in order to
differentiate their products
from the competitions'.
The third design made its debut in 1902, and was
again patented by Stanley.
Planes configured with this design have
"PAT'D/MAR-25-02/AUG-19-02"
embossed on the bottom casting, right below the brass depth
adjustment nut.
This re-design of the frog likely was an attempt of
Stanley's to keep the
competition at bay, since their original design's patents
had expired just 5
years earlier.
Under the new design, the frog receiver (on the
bottom casting) is made up
of a cross rib, a center rib, and two large screw bosses
that flank each side
of the center rib. The leading edge of the frog itself has a
support directly
behind the mouth to offer a solid base as a measure to
reduce chattering. The
rear of the frog rests on the cross rib, across its full
width. The frog has a
groove that is centered across its width and is
perpendicular to its front
edge. This groove sits atop the center rib and is used to
align the frog,
keeping it square with the mouth. The center rib was slighty
modified to a
larger and arched shape starting around 1907. The two screw
bosses, used to
receive the screws that fasten the frog to the bottom
casting, are purposely
large and deep. They were made this way to prevent the sole
from deflecting
upward when the frog is screwed securely into place.
 The entire
frog
is adjustable forward or backward (to close or open the
mouth, as the case may
be) by a set screw that is accessible directly below the
frog's brass cutter
depth adjustment nut. This frog adjusting screw was first
offered on the Bed
Rock series of planes, but soon found favor with frog
adjusters everywhere and
was added to the Bailey series starting around 1907.
The entire
frog
is adjustable forward or backward (to close or open the
mouth, as the case may
be) by a set screw that is accessible directly below the
frog's brass cutter
depth adjustment nut. This frog adjusting screw was first
offered on the Bed
Rock series of planes, but soon found favor with frog
adjusters everywhere and
was added to the Bailey series starting around 1907.
The fourth design, made right after WWII, has the
frog receiver with the
center rib now cast to resemble a wishbone. There is a
'break' in the machined
area of the cross rib, right above the frog adjusting screw.
This new design
wasn't patented.
Occasionally, the word "IMPERFECT" can be found
stamped into the
bottom casting, on one of its sides. This means that the
plane didn't meet the
quality specifications during its inspection. Usually, the
imperfection is
something trivial, like a flaw in the finish or a casting
defect (a pockmark or
two). I've only noticed this marking on the planes made
during the mid-20th
century. The earlier planes that had quality problems were
likely trashed and
never made it out to the adoring public. Go see the #17 for some
other 'imperfect' information.
During the late 1920's and very early 1930's, Stanley
decided to paint some
of the frogs (on their sides only) a bright,
Cheeto's-colored orange - you
almost go blind looking at it. This orange paint covers the
normal japanning
that was used on the frog and main casting. Why Stanley did
this is anybody's
guess. Perhaps they were trying to go one-up on the Millers
Falls' line of
bench planes, where that company painted their frogs a
bright red. If this is
the case, it's rather laughable as Millers Falls was never
going to dethrone
Stanley as the world's leader in metallic bench planes.
However, Millers Falls
did debut their bench plane line in 1929, which is the same
time Stanley
offered their orange frogs.
This orange paint craze wasn't just limited to the
Bailey line of planes. It
can also be found on the Bed Rock series of bench planes,
some of the block
planes (the brass knob and adjuster are painted orange), and
on the #78 rabbet
(the embossed logo on the right side is highlighted in
orange). There are
probably other planes that got the treatment as well. The
bench planes are the
most commonly found orange decorated planes, with the
others being somewhat
scarce.
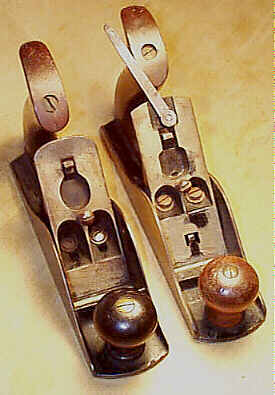
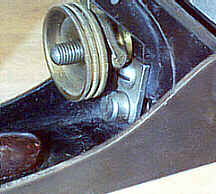
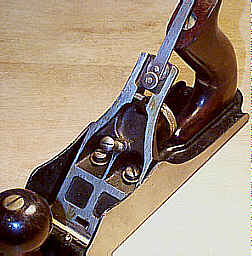
 Stanley produced a
very
short-lived frog design during the early 1870's (pictured in
the image to the
left). This design has a frog that is about 1/2 the length
of the normal frog,
and is nearly identical to the design that Leonard Bailey
was producing when he
got pissed off at Stanley and decided to come up with a new
line of bench
planes, his Victor line. Stanley, realizing the genius of
Leonard Bailey, may
have thought that his new design would prove to be a threat
to the conventional
design and then decided to mimic his. Bailey's Victor design
certainly proved
easier to manufacture as there was less machining involved,
but it does have
two real flaws: there is no ability to adjust the frog to
open or close the
mouth; and the cross-rib that carries the frog is
susceptible to cracking or
breaking due to the stress placed on it from overtightening
the lever cap or
during planing. This frog is secured to the cross-rib via
two screws that are
oriented horizontally. Nice attempt Leonard and Stanley,
especially since one
size frog could be used on multiple sizes of the bench
planes (#3 through #8),
but the one frog
fits all definitely didn't satisfy all users of the
planes.
Stanley produced a
very
short-lived frog design during the early 1870's (pictured in
the image to the
left). This design has a frog that is about 1/2 the length
of the normal frog,
and is nearly identical to the design that Leonard Bailey
was producing when he
got pissed off at Stanley and decided to come up with a new
line of bench
planes, his Victor line. Stanley, realizing the genius of
Leonard Bailey, may
have thought that his new design would prove to be a threat
to the conventional
design and then decided to mimic his. Bailey's Victor design
certainly proved
easier to manufacture as there was less machining involved,
but it does have
two real flaws: there is no ability to adjust the frog to
open or close the
mouth; and the cross-rib that carries the frog is
susceptible to cracking or
breaking due to the stress placed on it from overtightening
the lever cap or
during planing. This frog is secured to the cross-rib via
two screws that are
oriented horizontally. Nice attempt Leonard and Stanley,
especially since one
size frog could be used on multiple sizes of the bench
planes (#3 through #8),
but the one frog
fits all definitely didn't satisfy all users of the
planes.
Many folks find it confusing about whether Stanley or
Bailey made these
planes. The answer is, both made them. Leonard Bailey, while
working in
happening Boston, Massachusetts during the 1850's and
1860's, came upon the
fundamental design of planes with which we are all familiar.
These planes have
very little in the way of markings, except on the brass nut
where sometimes
"BAILEY" and "BOSTON" are stamped. Stanley, having been a
manufacturer of rules, levels, squares, etc for some 15
years, was looking to
expand their toolmaking business, so they bought out
Bailey's patents in 1869.
They produced the planes with little change, where the only
Stanley markings
were on the iron and on the lateral adjustment lever. In
1902, as homage to
Bailey, Stanley started making their castings with "BAILEY"
embossed
in them - these planes were made by Stanley, and Stanley
alone. In 1925, lever
caps were first offered with "STANLEY" embossed in them,
while the
bottom castings were still being made with "BAILEY" cast
into them.
Many people believe that the lever caps are replaced on
these models or that
they aren't Stanley products since they have "BAILEY" on
them. They
most assuredly are Stanley products. The Bailey-made stuff,
from Boston, is
very scarce and highly prized by collectors.
#3C Smooth plane, 8"L, 1 3/4"W, 3 1/8lbs, 1898-1970.
The corrugated version of the #3.
Like the #2C,
the advantages that corrugations supposedly offer the
plane during use are
somewhat questionable on a plane of this size.
#4 Smooth plane, 9"L, 2"W, 3 3/4lbs, 1869-1984.
The standard smoothing plane. This, along with the #5, are what made Stanley a fortune. This plane will out-smooth any sanding, scraping, or whatever on most woods. There are woods that present themselves as problems for this plane, and the rest of the Stanley bench planes for that matter, but this shouldn't deter you from owning one. The planes were designed to be general purpose and affordable, not to conquer any wood tossed their way. Many modern woodworkers have their first plane epiphany with this little tool as the curls come spilling out its mouth.
Occasionally, you might find an early version of this
plane with a built-in
oiler located at its knob which holds oil that is drained
through perforations
drilled through the sole, directly beneath the knob. This
was an aftermarket
addition, and unlike other aftermarket ideas, like the
tilting handles on
modified #10's,
which Stanley eventually put into production, the oiling
device soon became a
genetic deadend in the tool tree. The same oiling device
can also be found on #5's.
#4C Smooth plane, 9"L, 2"W, 3 3/4lbs, 1898-1970.
The corrugated version of the #4.
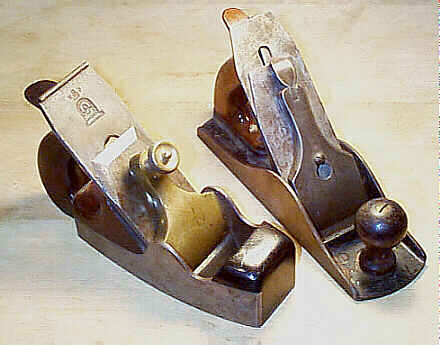
#A4 Smooth plane, 9"L, 2"W, 2 1/4lbs, 1925-1935. *
One of Stanley's dumber ideas, as can be inferred from their short time of offering, was the aluminum planes. The bed and frog on this plane are made from aluminum, which makes the plane lighter. This was the supposed appeal of these planes, that they are lighter than the iron planes. That, and that they weren't prone to rusting. Rosewood was used for the knob and tote. Despite all these swell features, the planes were a miserable flop.
 These
planes
were produced at a time when nickel plating appeared on the
lever caps. All the
ones I've seen have the old-style lever cap, without the new
kidney-shaped hole
that was first produced in 1933. If you see one of these
planes with a lever
cap that is nickel plated and has a kidney-shaped hole, it's
probably a replacement.
The depth adjusting knob is also nickel plated, as well as
the lateral
adjustment lever.
These
planes
were produced at a time when nickel plating appeared on the
lever caps. All the
ones I've seen have the old-style lever cap, without the new
kidney-shaped hole
that was first produced in 1933. If you see one of these
planes with a lever
cap that is nickel plated and has a kidney-shaped hole, it's
probably a replacement.
The depth adjusting knob is also nickel plated, as well as
the lateral
adjustment lever.
They'd be useful tools if you were planing over your
head all day, but not
many of us do that. Since aluminum oxidizes easily, these
planes leave
despicable skidmarks (for lack of a better word) on the
freshly planed wood.
The planes - those that were used, that is - also tend to
develop a very ratty
look to them. The surface of the aluminum becomes riddled
with dings and
scratches making them blech to even the casual Stanley
collector (well, maybe
not all of them, but many of them for certain) - most of
them take on a
striking resemblance to the lunar landscape after being
used. Those that are in
mint condition have some appeal about them, but they still
have look like of an
aluminum pot or piece of foil. If you're collecting this
stuff, make sure it's
aluminum and not some iron plane in aluminum paint clothing
- if the weight of
the thing doesn't clue you in, a magnet will.
The aluminum planes were appreciably more expensive
than the cast iron
models. For instance, the #A4 cost
$5.65 at its introduction, whereas the #4
cost $4.20 during the same time. Even back in the
Roaring 1920's, consumers were smart enough to avoid a
plane that cost over 25%
more than one that did a better job.
You have to wonder if any heads rolled for this
braindead idea? Lucky for us
that Stanley didn't make a mitre box, or something like
that, out of aluminum.
Hey, wait a minute, they did! Let's just say that the
company was going through
a phase and be done with it.
#S4 Steel smooth plane, 9"L, 2"W, 3lbs. 1926-1942.
 Offered as indestructable
planes (maybe Stanley foresaw the nuclear arms race?),
Stanley made these
planes for heavy duty abuse. They advertised them as being
useful for shops
that had concrete floors. If I were in Stanley's marketing
department, back
when the planes were offered, I would have added that the
planes were also
designed for those workdudes prone to losing their temper,
where the planes can
withstand their being slammed to the ground during a fit of
rage, like after
you smash your thumb with a hammer or something like that.
Offered as indestructable
planes (maybe Stanley foresaw the nuclear arms race?),
Stanley made these
planes for heavy duty abuse. They advertised them as being
useful for shops
that had concrete floors. If I were in Stanley's marketing
department, back
when the planes were offered, I would have added that the
planes were also
designed for those workdudes prone to losing their temper,
where the planes can
withstand their being slammed to the ground during a fit of
rage, like after
you smash your thumb with a hammer or something like that.
These planes beg abuse, and have a pressed or forged
steel bottom. The steel
is bent to form a U-shape. A piece forward of the mouth and
rear of the mouth
are riveted to the steel bottom. The lever cap and frog are
made of malleable
iron (the normal bench planes have their bottom casting made
of gray iron),
with the frog's casting having a noticeably coarser texture
than those provided
on the Bailey line.
The frog design is unique to this plane, and is not
interchangable with
other bench planes. The upper portion of the frog has
concave sides, and
resembles a glass long-neck beer bottle. The frog is
adjustable with the same
patent arrangement that was provided on the Bailey bench
planes. I have seen
some examples that have a spacer piece placed behind the
fork that engages the
frog adjusting screw.
 They resemble the look
of the BED ROCK series of planes, with their semi-squared
off sides (actually,
they are slightly concave), instead of the rounded sides
found on the Bailey
line. Their knob and tote are rosewood - a species that's
certainly capable of
withstanding the plane smashing on concrete? Speaking of the
knob and tote, the
totes used on these planes have a large hole bored in their
bottoms so that
they can engage the boss in which the tote screw fits. Thus,
a normal #4 tote cannot fit on
this plane without first enlarging the hole.
They resemble the look
of the BED ROCK series of planes, with their semi-squared
off sides (actually,
they are slightly concave), instead of the rounded sides
found on the Bailey
line. Their knob and tote are rosewood - a species that's
certainly capable of
withstanding the plane smashing on concrete? Speaking of the
knob and tote, the
totes used on these planes have a large hole bored in their
bottoms so that
they can engage the boss in which the tote screw fits. Thus,
a normal #4 tote cannot fit on
this plane without first enlarging the hole.
The knobs are always the high knob variety, but the
earlier models did not
have the raised ring into which the knob fits. After the
idea of a raised ring
was hatched, this plane had that feature applied to it to
help it be even more
indestructible than before.
The planes are finished nicely, and look rather
striking when in mint
condition (finding them anywhere near mint condition is
difficult since most of
the examples got transformed into dogs from all the rough
use). The lever caps
are nickel plated and look similarly to those used on the
Bailey series.
However, the lever caps are supposedly made of malleable
iron and have a
different pattern of recesses on their backsides than the
normal lever caps.
The frog and inside area of the bottom section are finished
with a flat black
japanning, which gives them the appearance of having been
repainted. The plane
is stamped "No. S4" into the top of the main portion (can't
say main
casting here since these planes aren't cast), right at the
toe, before the
knob.
This plane is scarcer than the regular #4, but it is by no means
rare. Seems there must have
been a lot of cement floors that were eating the Baileys,
I'll bet.
#4 1/2 Smooth plane, 10"L, 2 3/8"W, 4 3/4lbs. 1884-1961.
This is a wider and heavier smoothing plane that some find preferable. It's also the first fractional number designation in the Stanley series (if you think this numbering system is strange, don't ever try to memorize the model numbers of The Union Manufacturing Co, as they took to numbering some of their planes to the 1/8's; e.g., #4 3/8). Stanley, and other companies, would try to slip new models of planes into a numbering sequence of planes already in production, and would use the fractional designation so that they could be grouped with similar models in the sequence.
The very first model of the plane has no number
embossed at the toe, which,
according to those who have tried to make a chronological
typing of the Bailey
bench planes, made its debut on planes in 1885. If the type
study is to be
taken as gospel, along with the Stanley catalogs and
brochures, then the
non-embossed #4 1/2
planes were made
for a short one year, which makes a case for these
examples to be among the
rarest of all the bench planes. For this plane, one should
check the toe for
any signs of re-grinding and painting to make sure it's
legitimate. The planes
can also be found with the number embossed at the toe, and
in a pre-lateral (no
lateral adjustment lever) configuration. If you're at all
into collecting
pre-lateral planes, you'll want to be sure that the plane
isn't really one
that's been made up from a #4 1/2
body, and a pre-lateral #6 or #7 frog. Be sure the japanning is
original and matches
well between the frog and the main casting.
For some unexplainable reason, I see an abnormally
high number of #4 1/2's of warlwartwotype
(translation of toolspeak -
those made during WWII era) than I ought to. Like all
planes in this series
made during the war, the main casting of each is thicker
and consequently
heavier than those made prior/after the war. Some folks
like the extra weight
of these planes since the extra mass assists planing.
 I have this
half-baked, semi-baked, even fully-baked theory that Stanley
offered this plane
as competition for the heavier infill planes, being produced
in England.
Problem is, this one isn't even a 'contendah' with those
products from the
eastern shores of the Atlantic. Certainly their extra mass
is a step in the
right direction, but other than that, these planes are left
taxiing on the
tarmac, while the infills are soaring to new heights. Think
it sounds whacked?
Read on, and then look at the entry for the #4 1/2H for more proof.
I have this
half-baked, semi-baked, even fully-baked theory that Stanley
offered this plane
as competition for the heavier infill planes, being produced
in England.
Problem is, this one isn't even a 'contendah' with those
products from the
eastern shores of the Atlantic. Certainly their extra mass
is a step in the
right direction, but other than that, these planes are left
taxiing on the
tarmac, while the infills are soaring to new heights. Think
it sounds whacked?
Read on, and then look at the entry for the #4 1/2H for more proof.
The #4 1/2
was a plane that Stanley
added to their successful and well-established product
line, after they bought
Leonard Bailey's patents in 1869. Prior to this date,
Bailey had been producing
the same series of bench planes, in various
configurations, for roughly 8
years. The #4 1/2 plane wasn't
offered until ca. 1884. My cypherin' tells me that that's
23 years of no #4
1/2 for the
tool-hungry public.
Over in Scotland, Mr. Stewart Spiers was laboring in relative
anonymity (communication
between the bonnie shores of Scotland and USofA was simply
a boatride away back
when Stewart first started), making bench planes designed
using the same
techniques as the traditional dovetailed mitre planes,
which had been around
for quite some time. Part of the appeal of these bench
planes to the
cabinetmakers was their mass, much heavier than other
planes, which assisted
the worker when faced with difficult grain.
Spiers was the uncontested infill planemaker for
decades due to the
traditional psyche that fills the typical English dude's
head. But the gaining
popularity of Spiers' product line eventually was noticed by
the toolmakers
south of Ayr, down in merry ol' England. The most famous of
them, Thomas
Norris, started direct competition with Spiers sometime in
the second half of
the 19th century - it's actually debatable when he first
took to making planes
since his earliest descriptions of his trade were as a tool
dealer, not as a
planemaker. Norris finally adopted the title 'planemaker' in
1887.
Eventually, many other English and Scottish
planemakers jumped on the infill
bandwagon. Names like Mathieson, Preston, Slater, and a host
of others all
raced for a slice of the infill pie by the 1880's. All of
the makers were
producing infill planes that were nearly identical to their
competition's -
heavy, solid, and massive when compared to wooden and
'inferior' American
products. This rush by many manufacturers to fill the demand
for fine planes
had to have been noticed either by Stanley or by their mole
operatives over in
England.
By the 1880's, Stanley had positioned themselves as
the largest toolmaker in
America, and one of the world's largest. They were on a
mission of world
domination, and set the wheels in motion to do just that. To
achieve that end,
they had to be saavy to what was hot and what was not. If
they couldn't buy up
their competition, they'd just offer a similar tool at a
more affordable price.
Give the customers what they want, or at least what Stanley
would tell them
they wanted, and at an affordable price, was Stanley's m.o.
for world
domination.
During this time Stanley was in its initial stages of
expanding its product
line with whatever they thought could sell. Tools like the #45, the #50, the #66, the #71, the #72, the #74, the #112, the #180-#182, the #190-#192, and
yes, the #4 1/2, all made their
debuts during the 1880's. And guess what? That same era
was when all them
English dudes were making them heavy infills - the time
when their popularity
finally escaped the lochs of Scotland for the toolmaking
powerhouses of
England.
All the aformentioned tools were a radical departure
from Stanley's main
product line of bench and block planes. However, one of them
wasn't, the #4
1/2. Stanley just
reconfigured the common #4, feeding it tool
vigoro, making it more massive. It's my belief that the #4
1/2 was Stanley's
weak attempt to satisfy the infill
demands that were here in the States (to sell the planes
to those Americans who
were buying English infills), and that they'd ultimately
target it to the
English planing audience. Stanley truly felt that their
planes were the best in
the world, and they were hell-bent to force that belief in
every corner of the
globe. They eventually did, as any tool historian knows,
even knocking off the
former English tool giants.
My opinion is that Stanley was jumping on the infill
bandwagon simply by
increasing the mass of the tool, but neglecting the other
finer points of these
planes. Stanley could not, or would not, make such a
significant design change
to their bench planes since they had too much at stake to
lose - mass
production at an affordable cost, both of which are contrary
to the infill
planes' practically custom production.
#4 1/2C 10"L, 2 3/8"W, 4 3/4lbs, 1898-1961.
The corrugated version of the #4 1/2.
#4 1/2H
Smooth plane,
1902-1924. *
These planes were 'unknown' for the longest time in
this country. It seems
that they were specifically targeted toward the English
market, where the
heavier infilled planes were still favored by many.
The main casting is very much like those castings
produced during WWII, with
their noticeably thicker dimensions. The plane does have the
letter
"H" cast after the number.
You might notice that I don't include the weight of
this plane here. Why?
Because I've never seen any Stanley literature or propaganda
about them.
Perhaps someone in the viewing audience can toss one on the
bathroom scale and
get back to me (in avoirdupois weights, not metric, please).
(Since the original writing of this tome, someone
actually did toss one of
these, and the #5 1/2H, on their bathroom scale to determine their
weight. If the scale
hasn't been doctored by a household dieter, and it is to
be believed as
accurate, this plane weighs in at 5lb. 2oz.).
#5 Jack
plane, 14"L,
2"W, 4 3/4lbs, 1869-1984.
The standard jack plane that Stanley sold by the
boatload. This is the most
useful of all the bench planes, and it is a very good plane
on which to learn
technique. It is the first plane used on rough stock to
prepare the surface
prior to use of the jointer and smoother. Practically every
John Q. Handyman
had one of these planes, of one make or another, for
household uses such as
trimming a door or sash.
Its iron is often ground slighty convex so that a
heavy cut can be taken;
the edges of it are rounded off so that it doesn't dig into
the wood. Each and
every woodworker, including the 'lectrical toolers of the
world, should have
this plane.
The plane can serve several roles when one doesn't
have all the other planes
in his kit. It can do the surface preparation with its mouth
set wide and a deep
set to the iron, it can do smoothing with its mouth set
narrow and a shallow
set to the iron, and it can do jointing, although not as
easily as the true
jointers, the #7
and #8.
#5C Jack
plane, 14"L,
2"W, 4 3/4lbs, 1898-1970.
The corrugated version of the #5.
#A5 Jack plane, 14"L, 2"W, 2 5/8lbs, 1925-1935. *
See #A4 for unbiased opinion. This is just that plane's bigger brother.
#S5 Steel jack plane, 14"L, 2"W, 3 3/4lbs. 1926-1942.
Go to #S4, and read that. This one is just its bigger brother.
#5 1/4 Jack plane, 11 1/2"L, 1 3/4"W, 3 3/4lbs, 1921-1983.
This is a smaller jack plane designed for manual training in school. It is often called the "junior jack plane". Nevertheless, it's still a very useful plane for us adults (and those who pretend to be). The planes eventually found favor by others, and it became rather popular, as indicated by its offering into the 1980's. The models made during the 1920's are more difficult to find than the later examples.
These planes are often found in a condition that
looks as if they were on
the wrong end of a bar room brawl. The punks of America,
serving time during
their plane tutelage, did their very best to make the planes
scream UNCLE! Such
mistreatment shouldn't happen to a dog.
#5 1/4C Jack plane, 11 1/2"L, 1 3/4"W, 3 3/4lbs, 1921-1942. *
The corrugated version of the #5 1/4. A tough plane to find, if you're smitten by the collecting bug. It's the scarcest plane of the entire Bailey series (those offered in the USofA), but it doesn't hold the honor of being the most valuable - that honor belongs to the #1. I've seen faked examples of this plane so let's be careful out there!
As proof that catalog listings of when the plane was
offered can be
erroneous, and that they must be taken with a grain of salt,
I uncovered an
example of this plane that dates some 20 years prior to its
supposed
manufacture. The plane is unmistakably from the turn of the
century as it
doesn't have the frog adjusting screw that was applied to
the Bailey series ca.
1907. Furthermore, it also has the old style frog that was
dropped ca. 1905.
This plane was found in the New Britain, CT area, home to
Stanley, and it's
probable that the plane was made in a small batch to
test-market its acceptance
prior to adding it to the catalog for the masses to enjoy.
#5 1/2 Jack plane, 15"L, 2 1/4"W (2 3/8" 1939 on), 6 3/4lbs, 1898-1958.
A wider and heavier jack plane for rougher work. These make good planes for preparing broad areas such a truing panels.
Be careful when searching for replacement irons for
these planes. Take note
of the change in the iron's width. The older planes have to
have an old iron
made prior to the change in width; you'll have to use an
original, if you need
a replacement, as this width of iron is unique to this
plane.
#5 1/2C Jack plane, 15"L, 2 1/4"W (2 3/8" 1939 on), 6 3/4lbs, 1898-1958.
The corrugated version of the #5 1/2.
#5 1/2H Jack plane, 15"L, 2 3/8"W, 1902-1924. *
Go to #4 1/2H, and read that. This one is just its bigger and heavier brother.
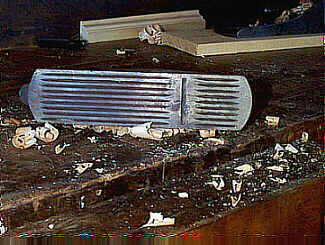
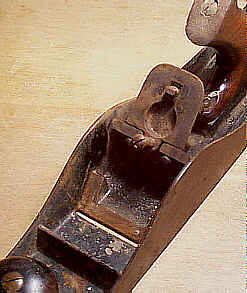
#6 Fore plane, 18"L, 2 3/8"W, 7 3/4lbs, 1869-1970.
 I've never
found
this size plane useful. You Satan worshipers out there might
find them a useful
prop during your goat slicing schtick by placing three of
them alongside each
other. Just be sure that they all point toward New Britain
so that the number
"666" results. Or, you can do your impersonation of Satan
surfin' a
six as shown in the image (Blood&Gore is very fortunate
to have this image
as Satan grants very few photo-ops these days).
I've never
found
this size plane useful. You Satan worshipers out there might
find them a useful
prop during your goat slicing schtick by placing three of
them alongside each
other. Just be sure that they all point toward New Britain
so that the number
"666" results. Or, you can do your impersonation of Satan
surfin' a
six as shown in the image (Blood&Gore is very fortunate
to have this image
as Satan grants very few photo-ops these days).
The plane is definitely not as numerous as the #3's,
#4's, #5, #7's, and #8's.
Some guys prefer them for jointing, but the
whole function of jointing is to run a longer flat surface
over the edge you're
planing, which the longer planes do. Still, it's a plane a
smaller person may
prefer, since the larger ones are heavier. The burden of
pushing a heavier
plane can be minimized, however, by doing most of the
surface preparation with
the jack, and saving your energy for the large jointers.
Some oldtimers would stock their tool carriers with a
#6
(to use as a jointer) to help reduce the weight
they had to lug around from job to job. Stanley advertised
the plane as
"simply a short jointer." Other guys like to use them to
face
glued-up panels.
#6C Fore plane, 18"L, 2 3/8"W, 7 3/4lbs, 1898-1970.
The corrugated version of the #6.
#A6 Fore plane, 18"L, 2 3/8"W, 3 1/2lbs, 1925-1938. *
See #A5 for reference for unbiased opinion. Note that this one was offered for 3 years longer than the other two - proof that the #6 size isn't that popular? Hmmmm, I wonder.....
Anyway, I'll bet the champagne corks popped
simultaneouly with a deafening
sound (worse than that of any Lawrence Welk episode, for
sure) after the last #A6 left New Britain, bound
for some sucker in Anytown,
Borneo.
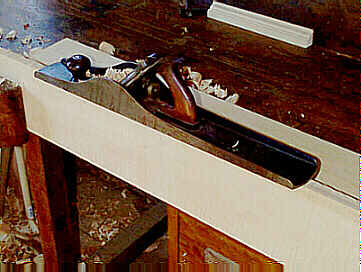
#7 Jointer, 22"L, 2 3/8"W, 8 1/8lbs, 1869-1970.
 The standard
jointer. This, along with a #4 and a #5,
is part of most woodworkers' handtool arsenals.
The standard
jointer. This, along with a #4 and a #5,
is part of most woodworkers' handtool arsenals.
The jointer is used to true an edge (make it
straight) or face (make it
flat). This task is usually now done by finger-eatin'
machinery, however, there
are many de-evolutionists who delight in using these cast
iron marvels. Show
just how tightly wound you are when you wow your pals with
the tightly wound
shavings that these planes produce.
There are a lot of folks out there who believe that
these longer planes -
the #6, #7, and #8 - have to be perfectly
flat in order for them to
work. Good luck finding one that's perfectly flat, as they
don't exist, all of
which is proof enough that the old timers, who depended
upon these tools for
their livelihood, could make effective use of them in a
non-perfect state.
Thing is, you can, too.
#7C Jointer, 22"L, 2 3/8"W, 8 1/8lbs, 1898-1964.
The corrugated version of the #7.
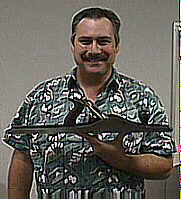
#8 Jointer, 24"L, 2 5/8"W, 9 3/4lbs, 1869-1961.
 The jointer for those
who are into bull work. This is a heavy animal, but once you
learn planing,
it's a great one to use. Its weight works to your advantage
- a plane in motion
wants to stay in motion - when running into a change in
grain or a knot. If
your first name is 'Patrick', like the norm-symp chucklehead
(odeen@concentric.net
or http://www.concentric.net/~odeen/oldtools
to send hatemail) in the image here (note that he isn't even
breaking a sweat
as he deftly holds it), you are compelled to own one of
these planes, and not
its wussy brother, the #7.
The jointer for those
who are into bull work. This is a heavy animal, but once you
learn planing,
it's a great one to use. Its weight works to your advantage
- a plane in motion
wants to stay in motion - when running into a change in
grain or a knot. If
your first name is 'Patrick', like the norm-symp chucklehead
(odeen@concentric.net
or http://www.concentric.net/~odeen/oldtools
to send hatemail) in the image here (note that he isn't even
breaking a sweat
as he deftly holds it), you are compelled to own one of
these planes, and not
its wussy brother, the #7.
#8C Jointer, 24"L, 2 5/8"W, 9 3/4lbs,
1898-1961.
The corrugated version of the #8, and far less common than the #7C.
[ START ] |
[ PREV ] | [ NEXT
] | [ END ]
[ HOME
]
Copyright
(c) 1998-20012 by Patrick A. Leach. All Rights
Reserved. No part may be
reproduced by any means without the express written
permission of the author.